Getting Started with Docker for Python Applications
Written on
Chapter 1: Introduction to Docker
Docker is an open-source platform developed by Docker Inc. that enables users to package applications along with their dependencies into containers. This technology allows applications to run seamlessly across various environments, including development, testing, and production. Docker addresses common challenges faced by developers, such as discrepancies between local and staging environments.
Before diving into installation, let's clarify some key Docker concepts:
- Docker Container: These are instances created from Docker images. They provide the necessary environment for running applications in isolation.
- Docker Image: This is a template used to create containers. Each Docker image is built upon a base image, like Ubuntu 14.04 LTS.
- Dockerfile: A text file containing a series of commands that specify how to build a Docker image.
- Volume: This represents a shared directory initialized when a container is created.
- Registry: A server that stores Docker images, allowing users to pull images as needed.
Section 1.1: Installing Docker
After installation, confirm it by running the command docker --version in your terminal. For this tutorial, I will be using a Windows machine.
Section 1.2: Creating Your Project
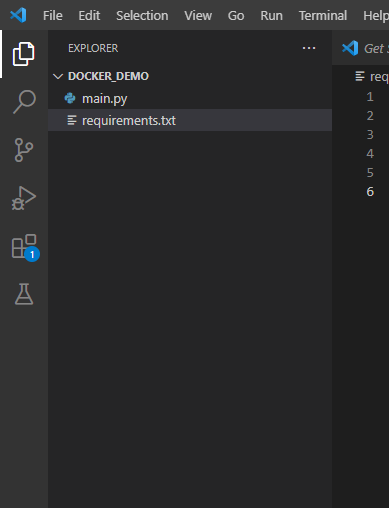
Open your preferred IDE, such as VS Code, and create a new project folder named docker_demo. Inside this folder, you will create two files: main.py and requirements.txt.

Main.py File
In the main.py file, we will utilize the NumPy library to create an ndarray object using the array() function as shown below:
import numpy as np
arr = np.array([1, 2, 3, 4, 5])
print(arr)
Requirements.txt File
The requirements.txt file should contain the necessary libraries:
numpy>=1.18.1
pandas>=1.0.1
python-dateutil>=2.8.1
pytz>=2019.3
six>=1.14.0
Next, we will create our Dockerfile.
Section 1.3: Creating the Dockerfile
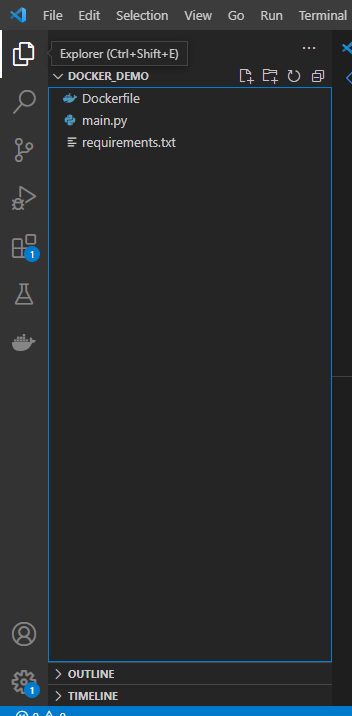
Create a new file named Dockerfile (without any extension) in your working directory.

Inside the Dockerfile, include the following commands:
# Start with the latest Python image
FROM python:latest
# Copy the requirements file into the app directory
COPY requirements.txt /app/
# Set the working directory
WORKDIR /app
# Upgrade pip and install the requirements
RUN pip install --upgrade pip
&& pip install --requirement requirements.txt
# Copy the main Python file into the working directory
COPY main.py .
# Define the command to run the application
CMD ["python", "main.py"]
Section 1.4: Building the Docker Image
To create your Docker image, execute the following command in your terminal:
docker build -t image_name .
Replace image_name with your desired name. For this example, I used:
docker build -t my_docker .
This command will generate a local image named my_docker.

Section 1.5: Running the Local Docker Image
To run your newly created Docker image, use the following command:
docker run my_docker
After executing this command, your application should run successfully, displaying the results as shown below:

Chapter 2: Useful Docker Commands
To view all containers, including stopped ones, use:
docker ps -a

For displaying only the active containers, execute:
docker ps
To show the most recently created container, run:
docker ps -l
We hope you found this guide informative. Thank you for reading!
A beginner-friendly tutorial on using Docker to containerize Python applications.
A comprehensive guide on how to effectively containerize Python applications with Docker.